Getting Started With How to Blend in Photoshop
Blending in Photoshop is a fundamental skill that allows you to combine and manipulate layers in creative ways to achieve stunning visual effects. When working with layers, blending involves two key settings: blending modes and opacity.
- Blending Modes: These determine how the pixels of one layer interact with the pixels of the layers beneath it. Each blending mode produces a unique effect, making it an essential tool for creating complex and creative edits.
- Opacity: This controls the transparency of a layer. A layer with 100% opacity is completely opaque, fully masking the layers below it. As you decrease opacity, the layer becomes more transparent, revealing the layers underneath.
Note: Keep in mind that the opacity of the background layer or any locked layer cannot be altered, and blending modes cannot be applied to them.
1. Blending Modes in the Layers Panel
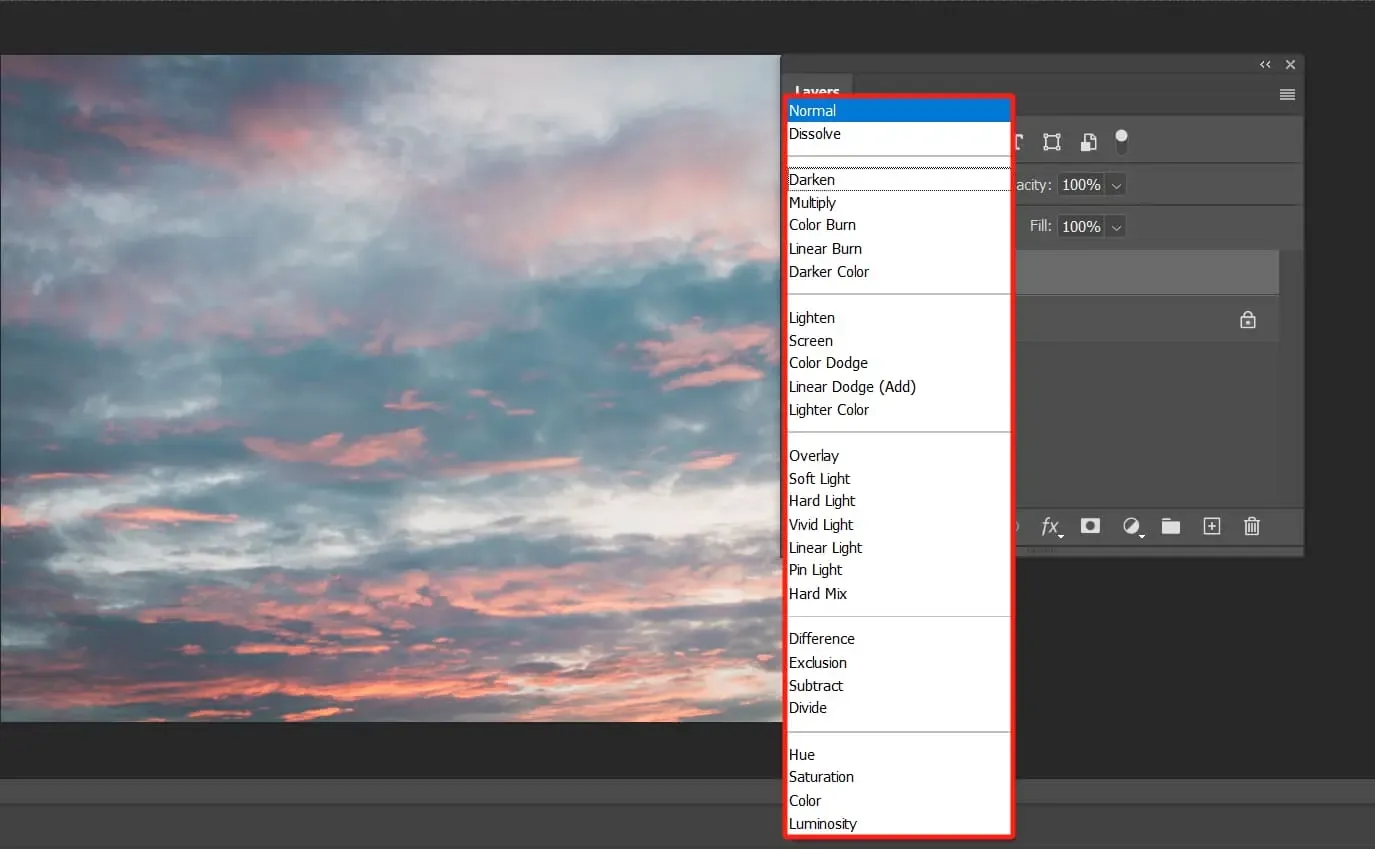
The Layers panel is where most of the blending magic happens in Photoshop. By default, each layer is set to the "Normal" blending mode, which means the pixels are simply overlaid without any interaction with the layers beneath. However, Photoshop offers a variety of blending modes that can be accessed from a dropdown menu in the Layers panel.
 |
| Layer Panel |
In addition to changing the blending mode, you can also adjust the opacity of the selected layer in this panel. This allows you to fine-tune how the layers blend together, creating either subtle or dramatic effects depending on your needs.
2. Blending Modes in the Brush Tool
 |
| Brush tool |
Blending modes aren’t limited to layers—they also apply to tools like the Brush tool. When you activate the Brush tool, you’ll find blending mode options in the options bar at the top of the workspace. These modes control how the brush strokes interact with the layer you’re painting on, allowing for a wide range of effects.
Using blending modes with the Brush tool is particularly useful in tasks like portrait retouching, where you may want to subtly enhance shadows or highlights without affecting the overall image too drastically.
Demystifying Photoshop Blending Modes
Blending modes are at the heart of Photoshop’s blending capabilities. Each mode operates as a mathematical function that alters how the pixels in different layers interact. While understanding the exact calculations can be complex, grasping the basic concepts behind each blending mode will allow you to harness their power creatively.
 |
| Blending mode |
Three fundamental concepts underpin all blending modes in Photoshop:
- Base Color: The original color of the image, or the color of the pixels in the layer below.
- Blend Color: The color applied through blending, or the pixels in the layer above.
- Result Color: The final color that results from blending the base and blend colors together.
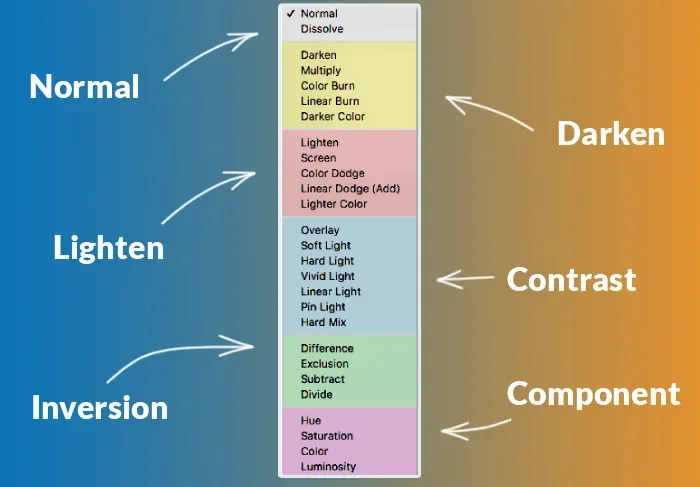
Photoshop organizes blending modes into groups based on similar functions. These categories can help you navigate and choose the right mode for your project.
1. Normal Group
The Normal group includes the most straightforward blending modes, where the pixels from one layer are either fully visible or replaced.
Normal Blending Mode: This is the default mode, where the pixels from the top layer are placed directly over the bottom layer. Adjusting the opacity or fill can reveal the layer beneath to varying degrees.
Dissolve Blending Mode: This mode randomly replaces some pixels from the top layer with transparency, revealing the layer beneath. The effect becomes more noticeable as you decrease the opacity of the top layer.
 |
| Dissolve Blending Mode |
2. Darken Group
The Darken group contains subtractive blending modes that darken the image by filtering out the highlights.
Darken Blending Mode: This mode compares the brightness of the blend and base colors. Brighter pixels in the blend layer are replaced with the base color, while darker pixels remain unchanged.
 |
| Darker Color Blending Mode |
Color Burn Blending Mode: This mode increases contrast by darkening the base color, with a stronger effect on the darker areas.
 |
| Color Burn Blending Mode |
Darker Color Blending Mode: This mode compares the sum of all channel values and displays the lower value, resulting in a darker image.
3. Lighten Group
The Lighten group features additive blending modes that brighten the image by filtering out the darker areas.
Lighten Blending Mode: This mode compares the base and blend colors, replacing darker pixels in the base layer with the blend color.
Screen Blending Mode: Screen mode brightens the image by multiplying the complementary colors of the blend and base colors.
Color Dodge Blending Mode: This mode lightens the base color by decreasing contrast, often used for adding highlights or creating glowing effects.
Linear Dodge Blending Mode: Linear Dodge increases brightness more aggressively than Screen or Color Dodge, creating a vivid brightening effect.
Lighter Color Blending Mode: This mode compares the sum of all channel values and displays the brighter color.
4. Contrast Group
The Contrast group combines the Darken and Lighten modes, working around a neutral 50% gray to increase contrast.
Overlay Blending Mode: A combination of Multiply and Screen, Overlay mode preserves the highlights and shadows while blending the colors.
Soft Light Blending Mode: Soft Light creates a subtle effect, similar to shining a diffused spotlight on the image. It increases or decreases brightness based on the blend color.
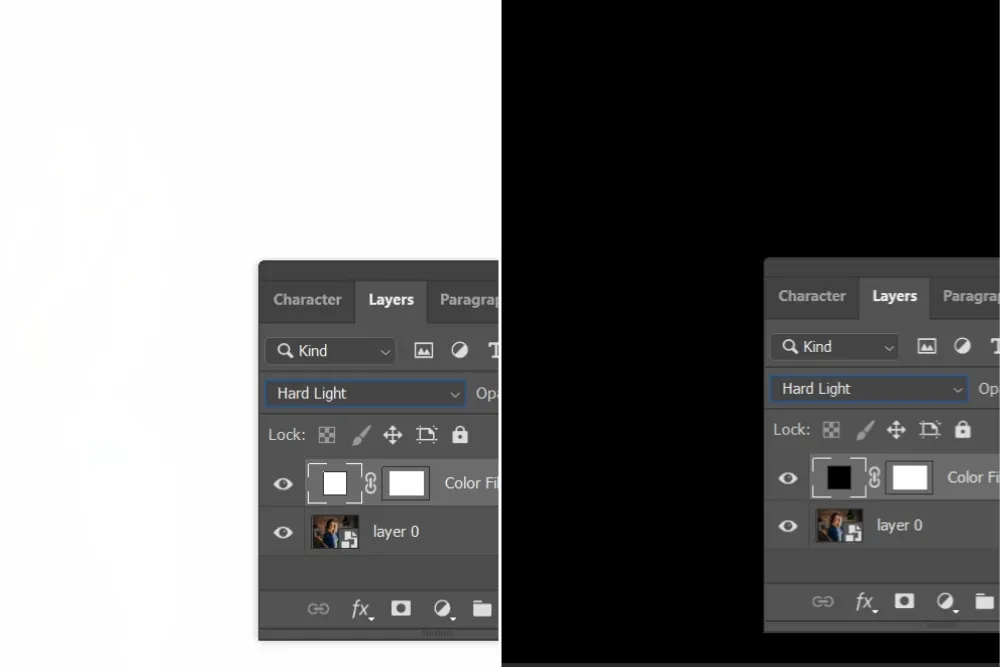
Hard Light Blending Mode: Hard Light produces a more intense effect than Soft Light, combining the Multiply and Screen modes to create a strong contrast.
 |
| Hard Light Blending |
Vivid Light Blending Mode: This mode increases or decreases contrast based on the brightness of the blend color, resulting in a high-contrast image.
 |
| Hard Mix Blending |
Pin Light Blending Mode: Pin Light replaces pixels based on the brightness of the blend color, producing a unique and often harsh effect.
Hard Mix Blending Mode: Hard Mix blends the RGB values of the blend and base colors, producing a result that contains only black, white, and six primary colors.
 |
| Hard Mix Blending |
5. Inversion Group
The Inversion group consists of modes that create effects by inverting or subtracting color information.
Difference Blending Mode: Difference subtracts the blend color from the base color, producing high-contrast results.
Exclusion Blending Mode: Similar to Difference but with less contrast, Exclusion creates a softer effect.
Subtract Blending Mode: Subtract mode subtracts the blend color from the base color, resulting in dark, muted colors.
Divide Blending Mode: Divide inverts the blend and base colors, creating an image with strong contrast.
6. Component Group
The Component group focuses on blending based on specific color properties.
Hue Blending Mode: Hue mode replaces the hue of the base color with the hue of the blend color while preserving the base color’s saturation and brightness.
Saturation Blending Mode: This mode replaces the base color’s saturation with that of the blend color, leaving the hue and brightness unchanged.
Color Blending Mode: Color mode replaces both the hue and saturation of the base color with those of the blend color, making it ideal for adding color to black-and-white photos.
Luminosity Blending Mode: Luminosity mode replaces the brightness of the base color with that of the blend color, keeping the hue and saturation unchanged.
A Simple Demo: Tips for Using Blending Modes in Photoshop
Blending modes offer powerful tools for creating complex effects, but they can also be used for simple tasks. Let’s walk through a quick demo to illustrate how blending modes can transform an image.
Basic Blending with Opacity: Start by stacking two layers in Photoshop. Adjust the opacity of the top layer to blend it with the bottom layer. This basic technique allows you to create a soft, blended effect.
Using Lighten Blending Mode: Let’s say you want to add star trails to a night sky. Adjusting opacity alone might not achieve the desired effect. Instead, try using the Lighten blending mode. This mode will allow the bright stars to blend seamlessly into the sky without altering the darker areas.
Final Thoughts About Photoshop Blending Modes
Mastering Photoshop blending modes is essential for any serious Photoshop user. Whether you’re a photographer, graphic designer, or digital artist, understanding these modes will significantly enhance your ability to create stunning visuals.
While we’ve covered the basics in this guide, blending modes offer limitless possibilities. Experiment with different modes and combinations to discover new ways to bring your creative vision to life.

Post a Comment